Miscellaneous Payment Receipts
Miscellaneous Payments Receipts is the application for accept payments on miscellaneous payments.
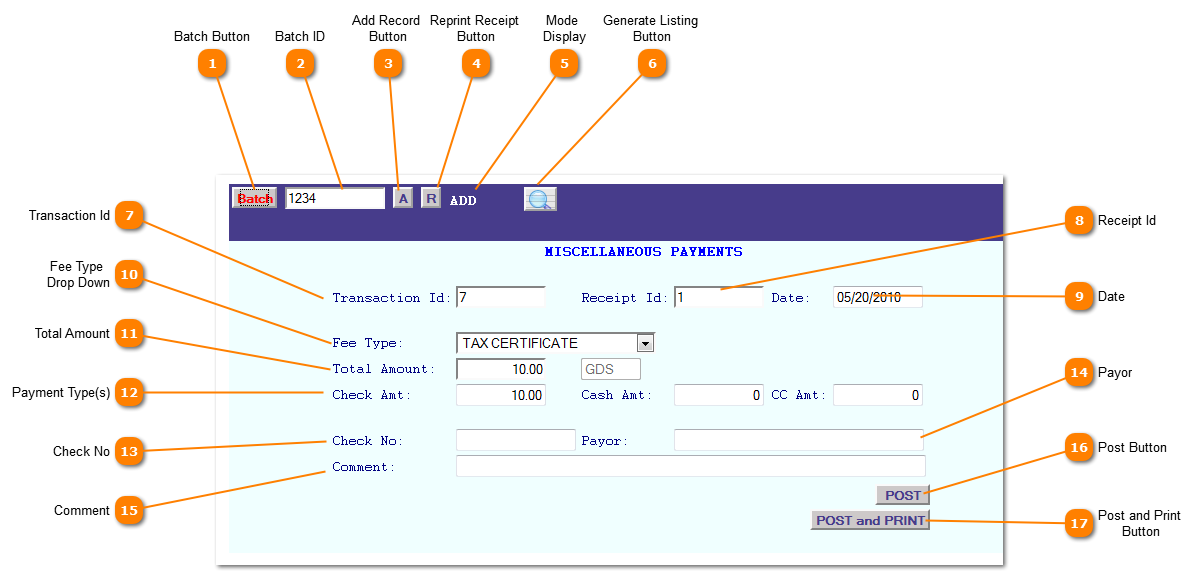
 Batch Button
 creates a new batch.
|
|
 Batch ID
Batch Id is the current opened batch which payments will be processed to.
Once you create a new Batch it will automatically populate in the drop down menu.
|
|
 Add Record
Button
Click the "A" button to add a new record. The mode button will change to "ADD".
|
|
 Reprint Receipt
Button
Click the "R" button to print a receipt on the record displayed.
|
|
 Mode
Display
Mode Display shows the current mode of the application.
|
|
 Generate Listing
Button
Generate Listing Button creates a listing of the records on file. The listing is created as a .pdf file.
|
|
 Transaction Id
A system generated (non editable) sequential number that has 1 added to it every time you post. This is necessary if you are going to make subsequent adjustments to the payment.
|
|
 Receipt Id
The Receipt ID is a data entry field for the user to put any control information in they desire.
|
|
 Date
This is the date you the payments were made, not necessarily the date that pre-populates.
|
|
 Fee Type
Drop Down
This is where you choose the Fee Type to post to.
|
|
 Total Amount
This is the total of all payments made
|
|
 Payment Type(s)
This is where you enter the amounts of various payments.
|
|
 Check No
Enter the check number if required
|
|
 Payor
Enter the payor name
|
|
 Comment
Enter any comments about this payment.
|
|
 Post Button
Post the payment
|
|
 Post and Print
Button
Post the payment and Print a receipt.
|
|