Quick Pay Delinquents | Accounts Selected for Payment Section
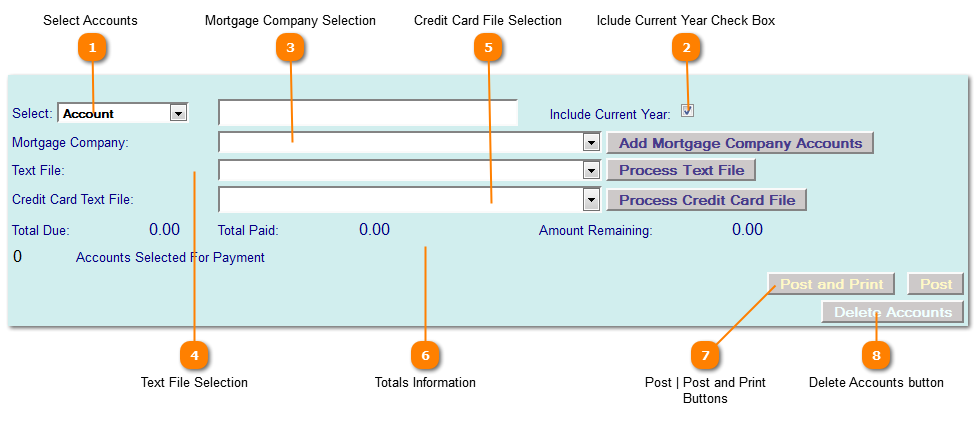
 Select Accounts
Select a method to add accounts from the Select Accounts drop down.
Options are:
-
Account - Individual Account Numbers
-
PIDN - Individual PIDN Numbers
-
Owner Name - Selects all accounts with the owner information matching what is entered.
-
Owner Id - Selects all accounts assigned to a specific owner id.
Enter the selection data based on method chosen from the drop down list.
If entering by mortgage company skip down to the Mortgage Company drop down.
|
|
 Iclude Current Year Check Box
Select the mortgage company from the list provided in the Mortgage Company Selections (drop down). The mortgage company records are created and maintained in the Mortgage Company Records program off the Interested Parties Menu. |
|
 Mortgage Company Selection
With a mortgage company selected press the Add Mortgage Company Accounts button to add account records. The system will display the accounts and payment information for this mortgage company.
|
|
 Text File Selection
With a text file selected from the Drop Down, press the "Process Text File" button to add account records. The system will display the accounts and payment information from this text file.
|
|
 Credit Card File Selection
With a credit card file selected press the "Process Credit Card File" button to add account records. The system will display the accounts and payment information from this credit card file.
|
|
 Totals Information
|
|
 Post | Post and Print Buttons
|
|
 Delete Accounts button
Press the Delete Accounts button to remove accounts from the selection list.
|
|