| < Previous page | Next page > |
How To... Add a Tax Certificate
One way of bringing up the Tax Certificates Screen is to select an account in “Taxpayer Account” and then clicking on the “Tax Certif” button in the application control section or select “Tax Certificates” from the main menu.
The Tax Certificate screen will display:
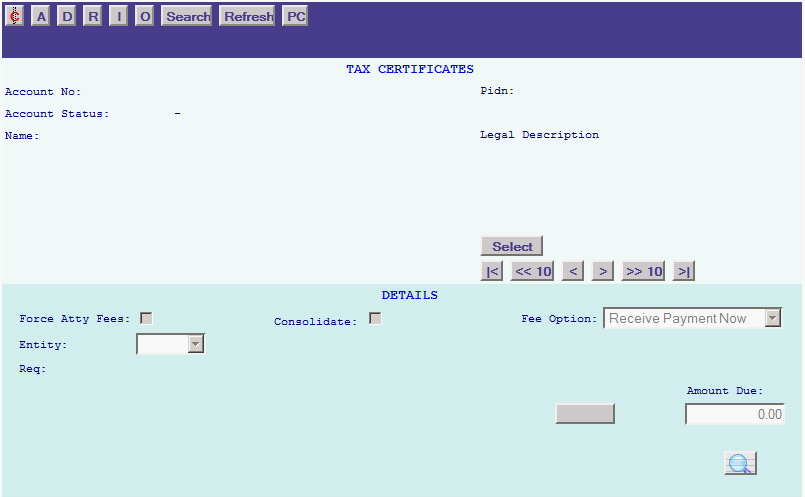
Click on the “A” in the application control section to enter the “ADD” mode. Enter the Account Number, PIDN, or Owner Name of the Account for the certificate to print.
If multiple accounts are possible, then the Account Selection Screen will appear:
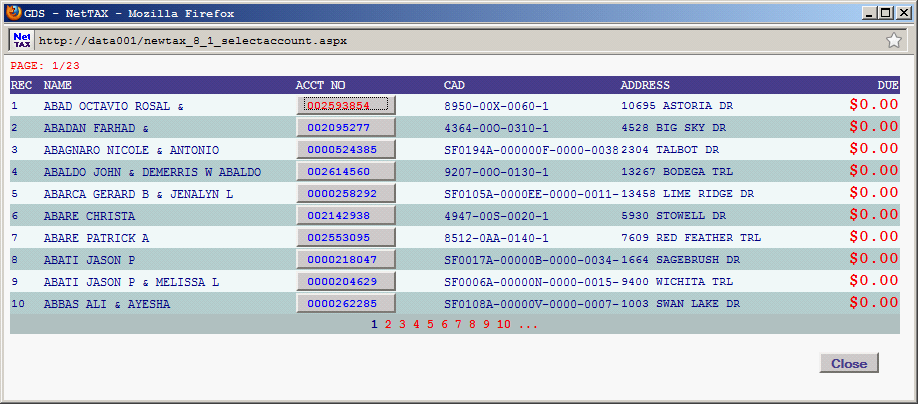
Choose the account desired by clicking on the “ACCT NO” button.
Under DETAILS, put a check mark as to whether or not you want to “Force Atty Fees”, and/or whether or not you want to “Consolidate” the CED and School as one.
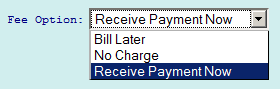
Choose “Bill Later” if you wish to send the person a bill. With this option, you must enter a valid Requestor on file (See How to … Tax Certificate Requestor Records).
Choose “No Charge” if the person is not going to be charged for the certificate.
Choose “Receive Payment Now” if they are paying for the certificate now.
If the account has multiple entities, then you can choose a particular entity to print for the certificate or leave blank to print the certificate for all entities.
Enter “999999” in the Requestor field if the Home owner is requesting the Certificate; otherwise enter a valid Tax Certificate Requestor Code.
If you are using the fee option of “Bill Later” then “999999” cannot be used.
Verify that the amount under Amount Due is correct. The amount will default to the amount that is setup in the Entity table.
If “No Charge” is selected, then be sure that the Amount Due is 0.00.
If the fee option of “Receive Payment Now” was selected, the following Miscellaneous Payments screen will appear:
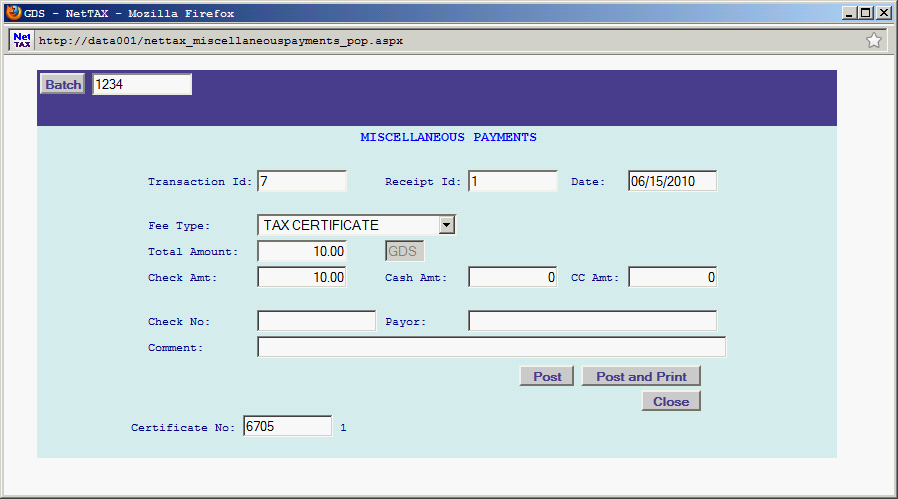
The Batch will default to the currently open Miscellaneous Batch ID.
If a Miscellaneous Batch ID is not currently open, then click on close and then go open a Miscellaneous Batch ID (See How to … Miscellaneous Payments).
NOTE: Be sure to have an open Miscellaneous Batch ID before starting the process of adding a Tax Certificate. If not, then you will end up having to start over after clicking on the ”Close” button on the Miscellaneous Payments Screen.
After entering the payment information, click on the “Post” or “Post and Print” button The Tax Certificate and Receipt, if selected, will come up for printing.
If the fee option of “No Charge” or “Bill Later” was selected, then the Tax Certificate will come up for printing.
Click on the “Refresh” button in the application control section to exit the “Add” mode.
|
| < Previous page | Next page > |